How To Take Down Kitchen Cabinet / How to Decorate Above Kitchen Cabinets from Thrifty Decor Chick : Then it was time to fix the upper cabinet.. The cabinets should be secured to the wall through the back brace every 16 inches with screws. Carefully remove the screws with a nut driver bit attached to a cordless drill. Then, turn off the water and the power to your kitchen. Open each cabinet section's drawers and doors to find the screws fastening it to the wall and to the cabinets next to it—usually one in each corner. Use a level to be sure that the cabinet is straight.
I need to take down the over the range bridge cabinet and reinstall it but i can't figure out how these cabinets are mounted to the wall. Use a level to be sure that the cabinet is straight. Cut the silicone adhesive between the cabinet and countertop using a razor knife. Remove them with a screwdriver. Remove cabinet doors and set aside.
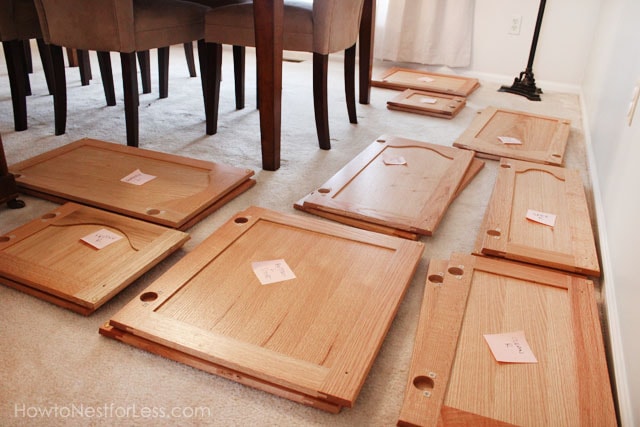
How to Paint Your Kitchen Cabinets - How to Nest for Less™ from howtonestforless.com In this case, use a pry bar to slowly work down the length of the cabinet to free it from the wall. Some builders will use nails to attach lower cabinets. Contractor that installed them worked alone and wasn't that great from what i am told. How to take down a soffit in your kitchen. 3/4 plywood as the backs and you can pry them off. Unscrew all fastenings and pull the drawers out. Open each cabinet section's drawers and doors to find the screws fastening it to the wall and to the cabinets next to it—usually one in each corner. Take off the cove molding along the soffit with a pry bar.
If the cabinet is nailed or otherwise attached to the wall, then you will need to use a pry bar to pull it free of the wall.
Finish up by replacing moldings and installing new hardware. If the cabinet is nailed or otherwise attached to the wall, then you will need to use a pry bar to pull it free of the wall. Cut the silicone adhesive between the cabinet and countertop using a razor knife. The cabinets should be secured to the wall through the back brace every 16 inches with screws. Begin at the top and work your way down each cabinet. After i got my pieces of plywood cut, i added pocket holes to attach to the existing cabinet. You can also use a drill, which is much faster. A lot depends on what the back of the cabinets are made of and what the walls of the kitchen are covered with. Place the corner cabinet into position on the wall stud marking. Otherwise, spray onto a cleaning cloth and then wipe the cabinets down. If you have removed all of the side screws and top screws from the cabinet, it should come off the wall easily. Set the doors to one side and look inside the cabinets to find out how the drawers are attached. The first thing to do it take your utility knife to cut through the bead of caulk used at the back side of the cabinet against the wall and wherever the cabinet and wall meet.
Cut the silicone adhesive between the cabinet and countertop using a razor knife. If the cabinet is nailed or otherwise attached to the wall, then you will need to use a pry bar to pull it free of the wall. With some patience, you can remove these cabinets easily without hiring a professional. Remove the fasteners that hold the cabinet to the wall. A lot depends on what the back of the cabinets are made of and what the walls of the kitchen are covered with.
What to Know About Refinishing Kitchen Cabinets | Real Simple from cdn-image.realsimple.com The cabinets should be secured to the wall through the back brace every 16 inches with screws. If the cabinet is not falling, it's still attached somewhere. A lot depends on what the back of the cabinets are made of and what the walls of the kitchen are covered with. Since you already have a plan to get rid of the cabinets over the peninsula, and you've got the floor and countertops planned out, i'd only change those things for now. Otherwise, spray onto a cleaning cloth and then wipe the cabinets down. If the cabinet is screwed to the wall from inside the cabinet, then use a screwdriver to unscrew it from the wall. Open each cabinet section's drawers and doors to find the screws fastening it to the wall and to the cabinets next to it—usually one in each corner. Then it was time to fix the upper cabinet.
Particle board or thinner plywood and the backs might just break up or come apart.
Take your measurements first, remove the doors, unscrew the cabinets and remove them from the wall. Otherwise, spray onto a cleaning cloth and then wipe the cabinets down. Unscrew all fastenings and pull the drawers out. Most hinges are screwed to the face frame of the cabinet. Use a screwdriver to remove the hinges from the doors. Remove cabinet doors and set aside. If they are nailed, it should be easy to pull the nails. For tough cabinets that are empty, you can spray directly onto the surface; Second thing to do is remove all doors and hinges. Once the cabinet is free from the wall, you and a partner can lift it down from the support blocks. Standard kraftmaid face frame cabinets from the mid to late 80's era. Use a level to be sure that the cabinet is straight. The first thing to do it take your utility knife to cut through the bead of caulk used at the back side of the cabinet against the wall and wherever the cabinet and wall meet.
Then, turn off the water and the power to your kitchen. 3/4 plywood as the backs and you can pry them off. Contractor that installed them worked alone and wasn't that great from what i am told. Use a straightedge to draw a line around the perimeter where the cabinet needs to be cut off. Open each cabinet section's drawers and doors to find the screws fastening it to the wall and to the cabinets next to it—usually one in each corner.
9 U Tube How To Take Down Kitchen Wall Cabinets | Home Design from thechecks.net Take your measurements first, remove the doors, unscrew the cabinets and remove them from the wall. Attach new drawer fronts to your existing drawers. Unscrew the cabinet unit from the soffit and remove the cabinets. At this time they should drop down. The cabinets should be secured to the wall through the back brace every 16 inches with screws. Remove them with a screwdriver. Some builders will use nails to attach lower cabinets. 3/4 plywood as the backs and you can pry them off.
Take off the cove molding along the soffit with a pry bar.
Place the corner cabinet into position on the wall stud marking. Open each cabinet section's drawers and doors to find the screws fastening it to the wall and to the cabinets next to it—usually one in each corner. Remove them with a screwdriver. Some builders will use nails to attach lower cabinets. If the cabinet is not falling, it's still attached somewhere. Then it was time to fix the upper cabinet. Elizabeth michels pinizzotto on dec 19, 2017. If the cabinet is nailed or otherwise attached to the wall, then you will need to use a pry bar to pull it free of the wall. First, prepare the room by removing all your dishes, pots, and pans from the cabinets. Throw away or donate the old cabinet doors, molding and hardware. Set the doors to one side and look inside the cabinets to find out how the drawers are attached. Cut the silicone adhesive between the cabinet and countertop using a razor knife. Don't forget the edges and sides of your cabinets.